A gas fireplace surround isn’t just trim around an insert, it’s the focal point that sets the tone for your entire room. Whether you’re upgrading a builder-grade box or finishing a new installation, the right surround can make a $500 insert look custom and a bland wall feel intentional. The good news? You’ve got options that range from a weekend DIY project to a full pro install, and materials that fit any budget and skill level. This guide walks through proven design styles, material choices, and practical installation considerations to help you pick, and build, a surround that actually works for your space.
Table of Contents
ToggleKey Takeaways
- A gas fireplace surround combines aesthetics with safety, framing the firebox while maintaining required clearances of 6 to 12 inches from combustible materials to prevent fire hazards.
- Gas fireplace surround ideas range from classic traditional mantels with molding to modern minimalist designs using large-format tile or floating wood shelves, each suited to different design styles and budgets.
- Popular materials include tile and stone ($2–$30+ per square foot), painted MDF or wood ($50–$800 for mantels), stacked stone veneer, and metal accents, each with distinct installation complexity and durability.
- DIY-friendly projects like installing pre-made mantels and tiling small areas use standard tools, while full-wall tile installs, custom stone work, or structural changes warrant professional installation at $1,500–$5,000+.
- Proper planning, including checking your manufacturer’s clearance requirements and using cement backer board in high-heat zones, ensures your gas fireplace surround meets building codes and increases home value.
Why Your Gas Fireplace Surround Matters
A gas fireplace surround serves three distinct functions: it frames the firebox, hides the rough opening and any gaps around the insert, and defines the aesthetic of the wall it’s on. Unlike wood-burning fireplaces that often come with masonry chimneys and existing mantels, gas units are frequently installed as stand-alone inserts or direct-vent boxes, meaning you’re starting with a metal rectangle and little else.
The surround also provides required clearances. Most gas fireplace manufacturers specify minimum distances from combustible materials to the firebox opening, typically 6 to 12 inches depending on BTU output and vent type. Check your unit’s installation manual before you frame or tile: violating clearances isn’t just a code issue, it’s a fire hazard.
Beyond safety, the surround anchors your room’s design. A poorly scaled mantel or mismatched tile can make even a high-end insert look like an afterthought. Conversely, a well-proportioned surround in the right material can turn a basic unit into a statement piece and increase perceived home value during resale.
Classic and Timeless Surround Styles
Classic surrounds lean on symmetry, proportion, and molding profiles that have been standard in residential construction for decades. These designs work in traditional, transitional, and even some contemporary spaces because they don’t fight the architecture, they complement it.
Traditional Mantel Designs
A traditional mantel surround typically includes a firebox frame (the innermost trim), pilasters or legs on each side, and a mantel shelf spanning the top. The shelf depth usually runs 6 to 8 inches to accommodate decor without looking top-heavy. Crown molding, dentil details, or fluted pilasters add visual weight.
Painted MDF or poplar is the go-to material for DIY builds, ¾-inch MDF is stable, takes paint well, and costs around $50 per 4×8 sheet. For a natural wood look, oak, maple, or cherry mantels are available as stock or semi-custom kits. Expect to pay $300 to $800 for a quality wood mantel kit, depending on species and finish.
When building a traditional surround, start with a level base. Use a laser level to mark your horizontal lines and a stud finder to locate solid backing for the mantel shelf, it should be anchored into at least two studs with 3-inch wood screws or appropriately sized lag bolts. Fill nail holes with spackling compound, sand smooth, then prime and paint. Two coats of semi-gloss or satin trim paint will give you a durable, cleanable finish.
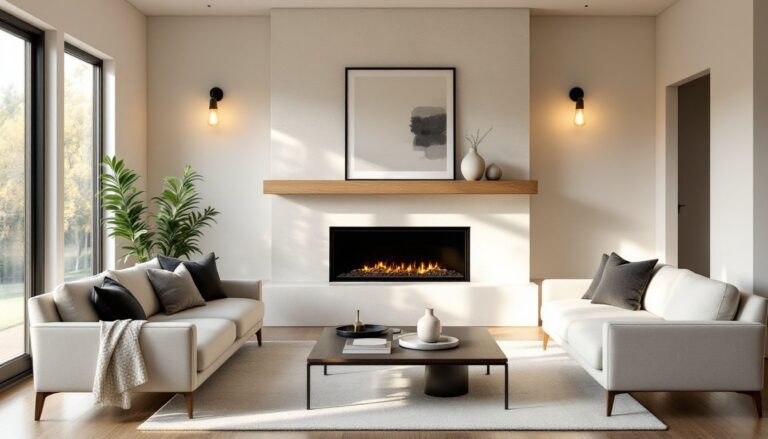
Modern and Minimalist Surrounds
Modern surrounds strip away ornament in favor of clean lines, flush surfaces, and material contrast. Think floor-to-ceiling tile, floating wood shelves, or frameless stone slabs that let the flame be the focal point.
One popular approach is a full-height tile surround that runs from floor to ceiling and wall to wall. Large-format porcelain tile (12×24-inch or 24×24-inch) in matte black, concrete gray, or white marble-look creates a seamless backdrop. Use ⅛-inch or 3/16-inch spacing for a contemporary grid, and a high-quality white or gray unsanded grout for narrow joints. Apply tile over cement backer board (like HardieBacker or Durock), not drywall, especially within the clearance zone.
Another minimalist option: a cantilevered wood or metal mantel with no visible supports. These are usually made from solid hardwood planks (2×6 or 2×8 nominal) or steel angle iron. The mantel is mounted to a steel bracket or French cleat hidden inside the wall, which must be lagged into studs. For a 60-inch span, plan on at least three lag points using ½-inch diameter lags into solid framing.
Keep the firebox surround material consistent. If you’re doing concrete-look tile, carry it into the firebox frame. If you’re using metal, consider a blackened steel or stainless insert trim kit from the fireplace manufacturer. Mixing too many materials in a modern design breaks the minimalist intent.
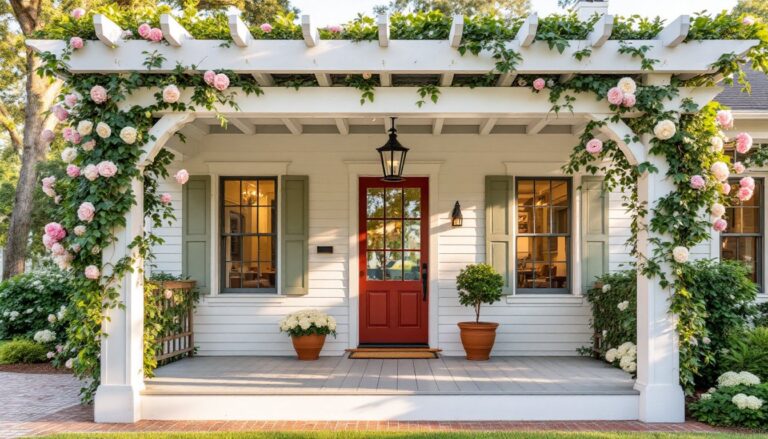
Rustic and Farmhouse-Inspired Ideas
Rustic surrounds embrace texture, reclaimed materials, and a lived-in feel. Barn wood mantels, stacked stone, shiplap accent walls, and hand-hewn beams all fall into this category, and they’re among the most forgiving styles for DIYers because slight imperfections add character.
A reclaimed wood mantel is the cornerstone of farmhouse style. Look for 6×6 or 8×8 rough-sawn timbers from salvage yards, or buy new “distressed” beams from lumber retailers. Real reclaimed wood may need cleaning, de-nailing, and sealing: new beams can be wire-brushed and stained to mimic age. Mount the beam on heavy-duty steel brackets or a hidden steel plate lagged into studs, these mantels often weigh 40 to 60 pounds or more.
Stacked stone veneer is another rustic staple. It’s available in natural stone (limestone, ledgestone, quartzite) or manufactured stone that’s lighter and easier to cut. Coverage is about 8 to 10 square feet per box for natural thin veneer, and installation requires Type S mortar and a masonry blade on your circular saw or an angle grinder. Start from the bottom and work up, using a mason’s level frequently. Leave a ⅜ to ½-inch joint and finish with mortar or leave joints dry-stacked for a modern-rustic hybrid.
Shiplap or tongue-and-groove paneling around the fireplace adds vertical or horizontal lines. Use 1×6 or 1×8 pine boards, spaced with a nickel or dime for consistent reveals. Paint them white or gray for farmhouse charm, or stain them for a cabin vibe. Always install over furring strips or directly to studs, not just drywall, and keep combustible wood outside the manufacturer’s clearance zone.
Popular Materials for Gas Fireplace Surrounds
Choosing the right material depends on your design style, budget, skill level, and how much heat your gas unit puts out. Here are the most common options and what to know about each.
Tile and Stone: Porcelain, ceramic, marble, granite, and slate are all non-combustible and safe for fireplace surrounds. Porcelain is the most affordable and DIY-friendly, expect to pay $2 to $8 per square foot for standard field tile. Natural stone costs $10 to $30+ per square foot and may require sealing. Use thin-set mortar rated for high heat if you’re tiling close to the firebox, though most gas units don’t get hot enough to require specialty adhesive beyond the clearance zone.
Wood and MDF: Painted or stained wood is warm, customizable, and easy to work with standard carpentry tools. MDF is cheaper and more stable than solid wood, but it’s also heavier and requires primer before topcoats. Solid hardwoods like oak or maple can be stained to show grain. Keep all wood materials outside the clearance zone, usually 12 inches minimum from the firebox opening.
Drywall and Plaster: For ultra-minimalist or contemporary spaces, some designers finish the surround with drywall, then skim-coat with plaster or Venetian plaster. This creates a monolithic look with zero trim. It’s a pro-level skill, but the material cost is low, under $1 per square foot for drywall and joint compound.
Metal: Steel, blackened iron, and stainless panels are making a comeback in industrial and modern interiors. Fabricated metal surrounds are typically custom and require welding or professional install, but you can DIY a metal mantel shelf or frame using stock steel angle from a metal supply shop and a metal cutoff saw or angle grinder.
Brick: Thin brick veneer offers the look of a masonry fireplace without the weight. It’s applied like tile using mortar and requires pointed joints with a tuck-pointing tool. Real brick veneer runs $6 to $12 per square foot and pairs well with modern built-in cabinetry for a mixed-material look.
DIY vs. Professional Installation: What to Consider
Most surround projects fall into three tiers: straightforward DIY, advanced DIY with help, or best left to a pro.
DIY-Friendly Projects:
- Installing a pre-made mantel kit or shelf over an existing firebox
- Tiling a small surround area (under 30 square feet) with standard field tile
- Building a simple shiplap or board-and-batten accent wall around the fireplace
- Painting or refinishing an existing wood surround
Tools you’ll need: Miter saw or circular saw, drill/driver, level, tape measure, stud finder, caulk gun, tile wet saw (rentable), notched trowel for tile.
Advanced DIY (consider a helper or consultation):
- Full-wall tile install, especially with large-format or natural stone
- Building a custom wood mantel from scratch with detailed molding profiles
- Installing stacked stone or brick veneer over a large area
- Removing an old surround and reframing the wall to change the firebox opening size
These projects require more specialized tools (masonry saw, miter saw with fine-tooth blade, possibly a compressor and nail gun) and a solid grasp of level, plumb, and material expansion.
Hire a Pro When:
- You’re relocating the gas line or making changes to the vent system (requires a licensed plumber or HVAC tech and a permit in most jurisdictions)
- The surround is part of a larger remodel involving structural changes, like removing a load-bearing wall or adding built-in cabinetry
- You want a fully custom stone or tile design with intricate patterns, pro masons and tile setters can execute complex layouts faster and with fewer mistakes
- The existing framing or drywall is damaged and needs repair before finishing
Get at least two quotes, ask for photos of past fireplace work, and confirm the contractor is licensed and insured. Pricing varies widely by region and scope, but expect $1,500 to $5,000+ for a professional surround install depending on materials and complexity. Budget installs using basic tile or a stock mantel kit will be on the lower end: custom stone or built-in millwork pushes costs up. Always confirm that the work meets local building codes and manufacturer clearance requirements, your homeowner’s insurance and future buyers will appreciate it.